Predictive maintenance: 8 tools you need to know

Predictive maintenance: definition and examples
Today, industries cannot afford to interrupt production following equipment failures that could have been detected beforehand. These problems can be avoided by using predictive maintenance. The methods of systematic preventive maintenanceand conditional are intended to carry out interventions on parts at low cost, and whose deterioration level is easily controlled (checking an oil level, changing spare parts at predefined intervals). However, certain levels of deterioration that may lead to a failure are difficult to detect, such as the appearance of microcracks, the rise in temperature of rotating elements, an insulation defect, etc.

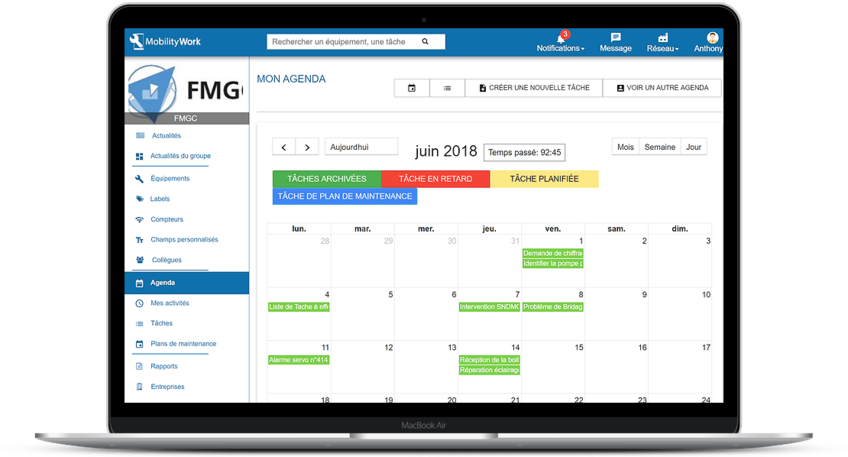
The calendar feature offered by Mobility Work CMMS allows you to plan all your preventive and predictive maintenance interventions.
La predictive maintenance is a maintenance “carried out according to the forecasts extrapolated from the analysis and evaluation of significant parameters of the deterioration of the property” (standard NF EN 13306 X 60-319). To help the maintenance team, there are several tools that are part of a set that can be called: “NDT — Non-destructive testing”.
Here are the different tools that can be used:
- Visual examination
- Penetrant control
- Radiographic check
- Ultrasonic control
- Thermography
- Magnetoscopy
- Leakage check
- Foucault currents
Predictive Maintenance - Visual inspection
The first non-destructive test to be carried out is the visual inspection. This makes it possible to carry out an initial inventory at a lower cost. The external condition of a part can provide essential information: the presence of defects such as folds, breaks, cracks, corrosion, etc.
The visual examination must be carried out in good conditions ensuring above all sufficient lighting (at least 350 LUX). If the part of the room to be checked is not accessible through a direct examination, a device called an endoscope is used, which consists of mirrors and lenses. Hidden defects with irregularities on the outer surface may suggest the existence of more serious defects on the inside.
Predictive Maintenance - Penetrating Control
Penetrating control makes it possible to highlight discontinuities (cracks, cracks) on any type of metal part. A colored or fluorescent penetrating liquid is injected into the defects, then is revealed by a revealing product.
It is therefore used to control:
- Molded or forged parts
- Mechanical parts after grinding and/or heat treatment
- Pre-/post-welding parts
- Rolled or drawn products in service
Predictive Maintenance - Radiographic Control
Radiography is a non-destructive testing method that consists in obtaining an image of the density of matter of an object crossed by electromagnetic X or gamma radiation.
This technique makes it possible to visualize the lack of material in the volume of the controlled object on a two-dimensional image.
Radiography is used by industry to monitor the internal health of a room. It makes it possible to detect any type of cavity or foreign material included in the piece. It is widely used in the control of welds, to search for foundry imperfections but also to verify the integrity of composite structures.
The major advantage of radiography lies in obtaining a well-defined image of the uniformity of material in a part. It is easy to detect contrasting indications, and it is also possible to distinguish between different types of indications. It is applicable to any type of material (aluminum, steel, copper alloys, titanium, composites, etc.).
The limitations of the method are linked to the costs of installations and consumables as well as to the dangers of ionizing radiation, which require strict regulations and instructions.
Predictive Maintenance - Ultrasonic Control
Ultrasonic testing is based on the transmission, reflection and absorption of an ultrasonic wave propagating in the room to be tested. The wave train emitted is reflected on the defects and then returns to the translator (which often plays the role of sender and receiver). The interpretation of the signals makes it possible to position the defect and to define its relative dimensions. This method has a high spatial resolution and offers the possibility of finding defects both in the volume of the material and on the surface.
Compared to radiographic control, which is also used in the search for defects in the volume of the material, ultrasonic testing offers the main advantage that it requires only one access face, does not present any danger associated with the use of radioactive sources and ionizing radiation and allows more precision on thick parts. The result is available in real time, unlike penetrant testing, which requires a waiting time of up to several hours. The disadvantages are that some metallic materials are difficult to control (coarse-grained materials) and that the control may take longer for thin thicknesses.
Predictive Maintenance - Thermography
Thermography makes it possible to obtain, by means of a thermal camera, a photograph of the thermal scene observed in the infrared spectral range. Thanks to the thermal camera, we therefore obtain the thermal image of a thermal scene.
The camera's internal technology and integrated programs make it possible to make this radiation visible through a reconstructed image. The temperature transcription operation will then make it possible to obtain a thermogram.
Room control by temperature measurement allows the observation of surface thermal effects. Such a test is non-destructive, fast, simple to implement and without contact with the target object (without disturbance). This type of control is mainly used for the control of electrical installations as well as for the thermal insulation of buildings.
Predictive Maintenance - Magnetoscopy
Magnetic particle scanning is a non-destructive testing technique that consists in creating an intense magnetic flux on the surface of a ferromagnetic material.
In the presence of discontinuity, the magnetic field lines undergo a distortion that generates a “magnetic leak field”, also called “magnetic flux leak”. An indicator product is applied to the surface to be examined during magnetization (simultaneous technique) or after magnetization (residual technique). The black colored and/or fluorescent indicator product is attracted to the defect site by magnetic forces to form indications.
These indications must be observed under appropriate conditions, either in artificial white light or daylight, or under ultraviolet radiation (UV-A) or actinic blue light, depending on the type of indicator product used.
Although magnetic particle scanning is more “restrictive” than penetrant testing, it is preferred when it is applicable, because it is, among other things, much faster.
Predictive Maintenance - Leak Check
Leak testing is a non-destructive test method designed to locate leaks and assess their importance in terms of flow or flow. The absence of material that allows a leak is called a leak. There is only a leak when the seal defect is subject to a pressure difference. Depending on the fluid concerned (liquid or gaseous), the quantity characterizing a leak is called “flow” or “flow”. There are several techniques for checking tightness, the most widespread being the bubble test technique, which consists in putting a part under gas pressure and immersing it in a liquid (global control) or spraying it with a surfactant solution (local control). Leakage occurs through the regular appearance of bubbles or foam at the site of the defect. The main advantage is the identification of faults in the range of microns, but the disadvantages of this technique are that the results are related to the control environment and to the preparation of the part, and that it requires the use of chemicals and gases under pressure.
Predictive Maintenance - Eddy currents
This NDT method consists in creating, in electrically conducting materials, currents induced by a variable magnetic field, by means of a sensor. These induced currents, called eddy currents, circulate locally in the material and have a distribution and distribution that depend on the magnetic excitation field, on the geometry and on the electrical conductivity and magnetic permeability characteristics of the part examined. In the presence of an anomaly in the controlled part, their movements are disturbed, thus causing a variation in the apparent impedance of the sensor which depends on the nature of the anomaly and its volume dimension.
It is the analysis of this variation in impedance that provides the indications that can be used to carry out the check. The interpretation of the signals collected is carried out by comparing those recorded in the controlled material with those of a reference part, comprising anomalies representative of the phenomena sought. Eddy current control is highly appreciated because of the various possibilities offered by its detection sensitivity and the easy automation of the method. In fact, the absence of contact between the probe and the part to be tested, the possibility of high speed scrolling and the ease of integrating the process into production lines are the main interests of Eddy Currents.
In conclusion, the field of non-destructive testing is evolving closer to that of instrumentation: in fact, today it is no longer enough to detect a defect, but it is also necessary to characterize and size it. It is necessary to imagine non-destructive techniques and processes capable of detecting property irregularities such as microstructure variations in a metal, variations in texture or roughness on a surface, variations in electromagnetic properties, etc.

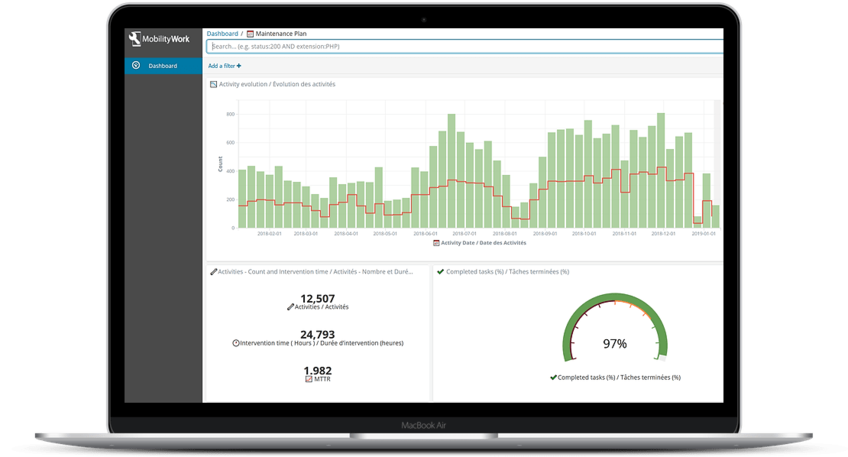
The forecasts of the Mobility Work analytics tool are based on data collected from thousands of users working on the same equipment.
These tools can certainly be expensive, they are generally used in sectors manufacturing parts with a high production cost, but are also used on machines whose operational reliability is critical (case of a bottleneck machine in a production workshop, of a compressor in a production workshop, of a compressor in a leather goods factory, of a cupola in a foundry, etc.). The analytical tool present on the Mobility Work CMMS system will allow you to detect equipment that requires this type of maintenance.
Any questions?
Contact us to discover the first CMMS that can be deployed in 3 weeks.